An Example Recall Search
This example takes you through the basic steps to creating an ad-hoc search to look for recalls with a status of outstanding and due within the next month:
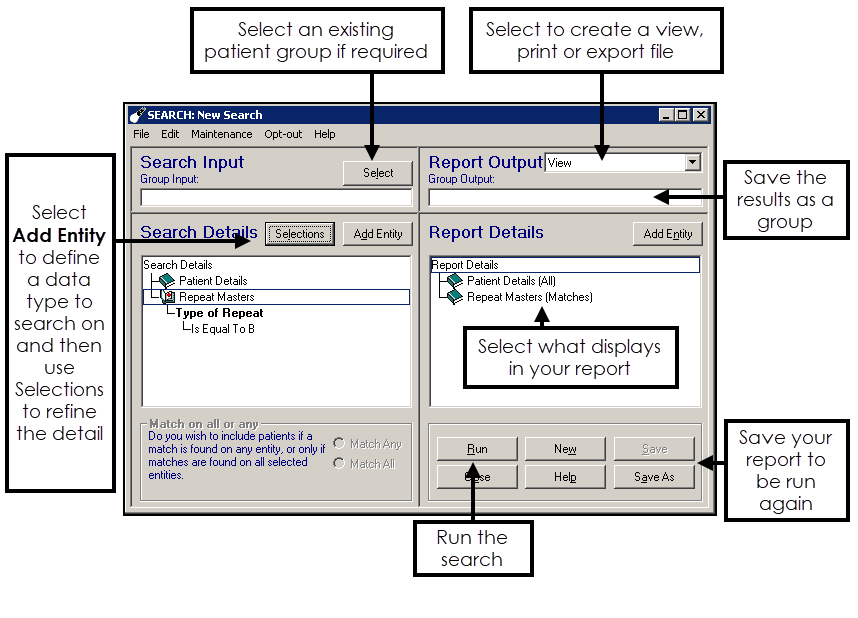
- From Search and Reports, select Ad-hoc search
 and the SEARCH: New Search screen displays.
 - Optionally, double click in Group Input to select a patient group. This bases the search on a group of patients, for example, all diabetics, the group could be from Clinical Audit, Patient Groups or created from a previous search.
By default this is blank, and uses all patients as the basis for the search.See Selecting a Group for details. - Enter the Search Details.
- Patient Details
Choose to search on all patients or refine by registration status, for example, permanent and applied. See - Patient Details. - Add entity
Select the data categories you want to search on, for example, select the Recalls entity to find patients with an outstanding blood pressure recall due in the next month.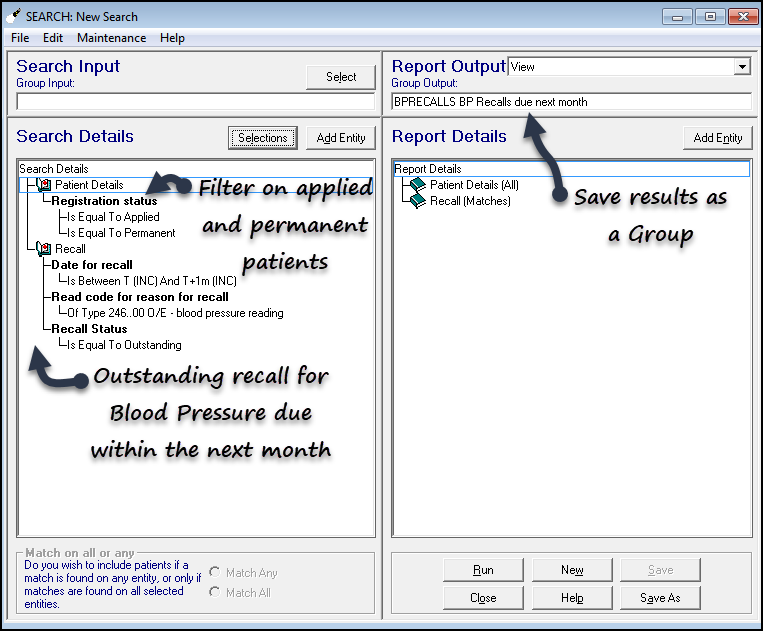
Alternatively, instead of using a date range, use the Before option, Before T+1M returns both patients with a recall due in the next month and patients with an outstanding recall which is overdue.
See - Adding Entities. - Add further entities as required
For example, add the weight entity to also find patients with a high BMI. - Options
This can be used to define include / exclude patients with certain criteria. For example, exclude patients with a current repeat medication in a certain drug class. See - Include / Exclude Options.
- Patient Details
- Refine the Report Details.
- Add entity
This includes additional information on the report, for example, medication. See - Report Details. - Matches
Define whether to look at the latest entry, for example, only the patient's last blood pressure. See - Matches.
- Add entity
- Optionally, double click in the Group Output box to save the results as a patient group.
This allows you to use the group in a future search or generate letters / recalls. - Choose the Report Output.
See - Report Output Overview. - Select Run to generate the search.
- If required, select Save, to save the search for future use.
Note - To print this topic select Print  in the top right corner and follow the on-screen prompts.